Wednesday, 27 February 2019

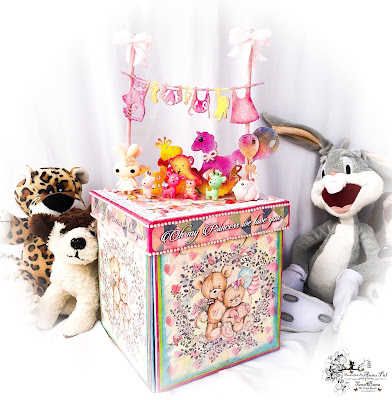
Little Princess Explosion box

Hello Crafty Ladies!!

Annu here today I am here to share with you all my new project as a "Guest Designer" for "The Element Craft Studio" of "Rakhi Mittal" didi. It is a very proud movement for me and this movement have came into my life only and only because of Rakhi didi. 


          Now a little about "The Element Craft Studio", they have a wonderful collection of MDF bases like every kind of boxes, trays, baskets, office table stationary stand stuff, home decor items, intricate decor pieces, wooden chipsters, embellishments, sentiments, miniatures stuff for doll houses or shadow boxes and beautiful scrapbook pattern paper, cardstock and lot more. For their whole range of products do visit their website link:-
https://www.theelementcraftstudio.com/


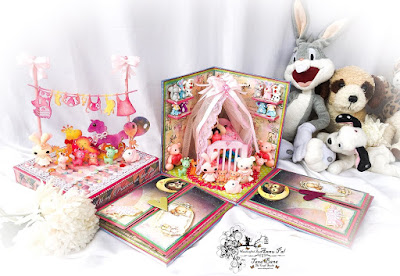
          This time I have made a "3D Exploading Baby box" for my cute and adorable little niece who is about to turn 6 months old so made this box with mini waterfall albums for capturing all her beautiful memories forever. Hope you all love my new creation.

Products Used


Instructions For The Box

My 3D exploding box measures 6 1/2 inch by 6 1/2 inch with lid. For the basic structure of the box and lid i have used medium weight chipboard. For the box I cut 4 pieces of chipboard measuring 6 1/4 inch by 5 3/4 inch and 1 piece measuring 5 3/4 inch by 5 3/4 inch this will be the base of the box to which all the four sides will be attached and for the lid I cut the top measuring 6 inch by 6  inch and for the sides i cut the chipboard measuring 6 inch in length and height measure 1 inch.


      Next I cut out some strips from the white cardstock measuring 1 inch and score it in half and joined all the 4 pieces with the base piece using the strips I also pasted the strips to all the edges of the 4 flap so the flaps are covered from all the sides. Next I joined the two flaps together  to make the walls for the room and left two flaps open. For the lid I joined all the 4 pieces together and interconnect them with the top of the lid with the strips that i cut from the white cardstock.

       Next I took the pink cardstock and cut out 8 pieces measuring 6 1/4 inch by 5 3/4 and 2 pieces measuring 5 3/4 inch by 5 3/4 inch and pasted them to all the flaps from outside to inside including the top and down side of the box base. Next i took the white cardstock and cut 8 pieces measuring 6 inch by 5 1/2 inch then i took the acrylic green shade and distress all the sides of the cut pieces and pasted it to ll the flap from inside out leaving the base as for the base i cut out i piece from the pattern paper measuring 5 1/2 by 5 1/2 inch and glued it down to the base. Next I took the desired pattern papers and cut them all measuring 5 3/4 inch by 5 1/4 inch  and then distress the edges using acrylic pear sky blue shade and pasted them from inside out on the flaps as earlier.Till now the base is decorated. You can refer to the pics below for detailed view.


Instructions For The Mini Waterfall Album

Firstly I took a pink cardstock and cut it measuring 10 1/2 inch by 5 3/4 inch, Next score it at 2 1/2 inch, 2 3/4 inch, 5 inch and 5 1/4 inch now fold it from all the scored lines and u will get a gatefold shaped card piece make one more piece in the same way.Next I took my favorite pattern paper and cut out 2 pieces from one sheet measuring 2.1 inch by 5 1/4 inch for outside of the gatefold flaps and did the same for inside flaps and for the center of gatefold i cut the pattern paper measuring 5 3/4 inch by 5 inch and pasted them down and also I fussy cut the exact  motifs from the motif sheet that where printed on the pattern paper that I have pasted on the front side of the gatefold flaps and then put some double sided foam tape and place them on the top of printed motif on the flap of gatefold card. Next will make the flaps for the mini waterfall album for this I cut out 6 flaps measuring 4 3/4 inch by 4 inch now from the top of 4 inch score at half inch and fold it down so your one flap is ready do this to all the flaps. Next I took 12 sheets of  my favorite pattern papers as need to paste them on both sides of the flap  and cut them all measuring 4 3/4 inch by 3 1/2 inch and distress all the edges with acrylic pearl yellow shade and once dried pasted them to both sides of the flap as desired. Next I cut out 12 motifs from the motif sheet and pasted them on each flap by gluing them from one side making an opening from other side to make pockets for sliding in the photographs and tags. Next comes the closing part of the gatefold flaps for that I have glued the pink satin ribbon on both the sides of the gatefold flap now simply tie a a knot and make a bow and for extra grip I have also added an magnetic heart shaped closure to it.do Repeat the same process for making the second mini waterfall album for the other flap.Refer to the pics below for more detailed view.


Instructions For The Center Piece And Room Decoration

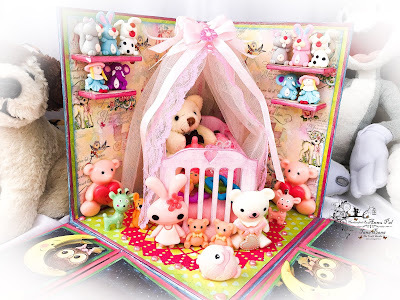
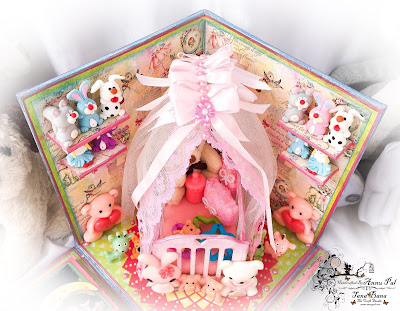
Firstly I assembled my baby crib. Next I gessoed the baby crib from inside out and once its dried I sanded it to give a smooth look, then painted white n pink in shading whole of the baby crib. Now i made bedding for crib with pink felt cloth, poly-wool, pink lace and little bow embellishment. Next I have made canopy for the baby crib, decorated it with ribbons, bow, laces, net, half pearls and miniatures. Now finally placed it inside the center of the box I placed it diagonally. plz refer to the pics below for details.


        Next I made shelves with chipboard for the baby room and placed some toys. Next I placed a cute little miniature teddy bear in the baby crib with miniatures.Then I put some cute little toys. Lastly I put some toys in front of the baby crib, some around the baby crib and some lying beside the walls. So finally my "Little Princess 3D Exploding Box " is ready. 

Instructions For The Decoration Of Lid

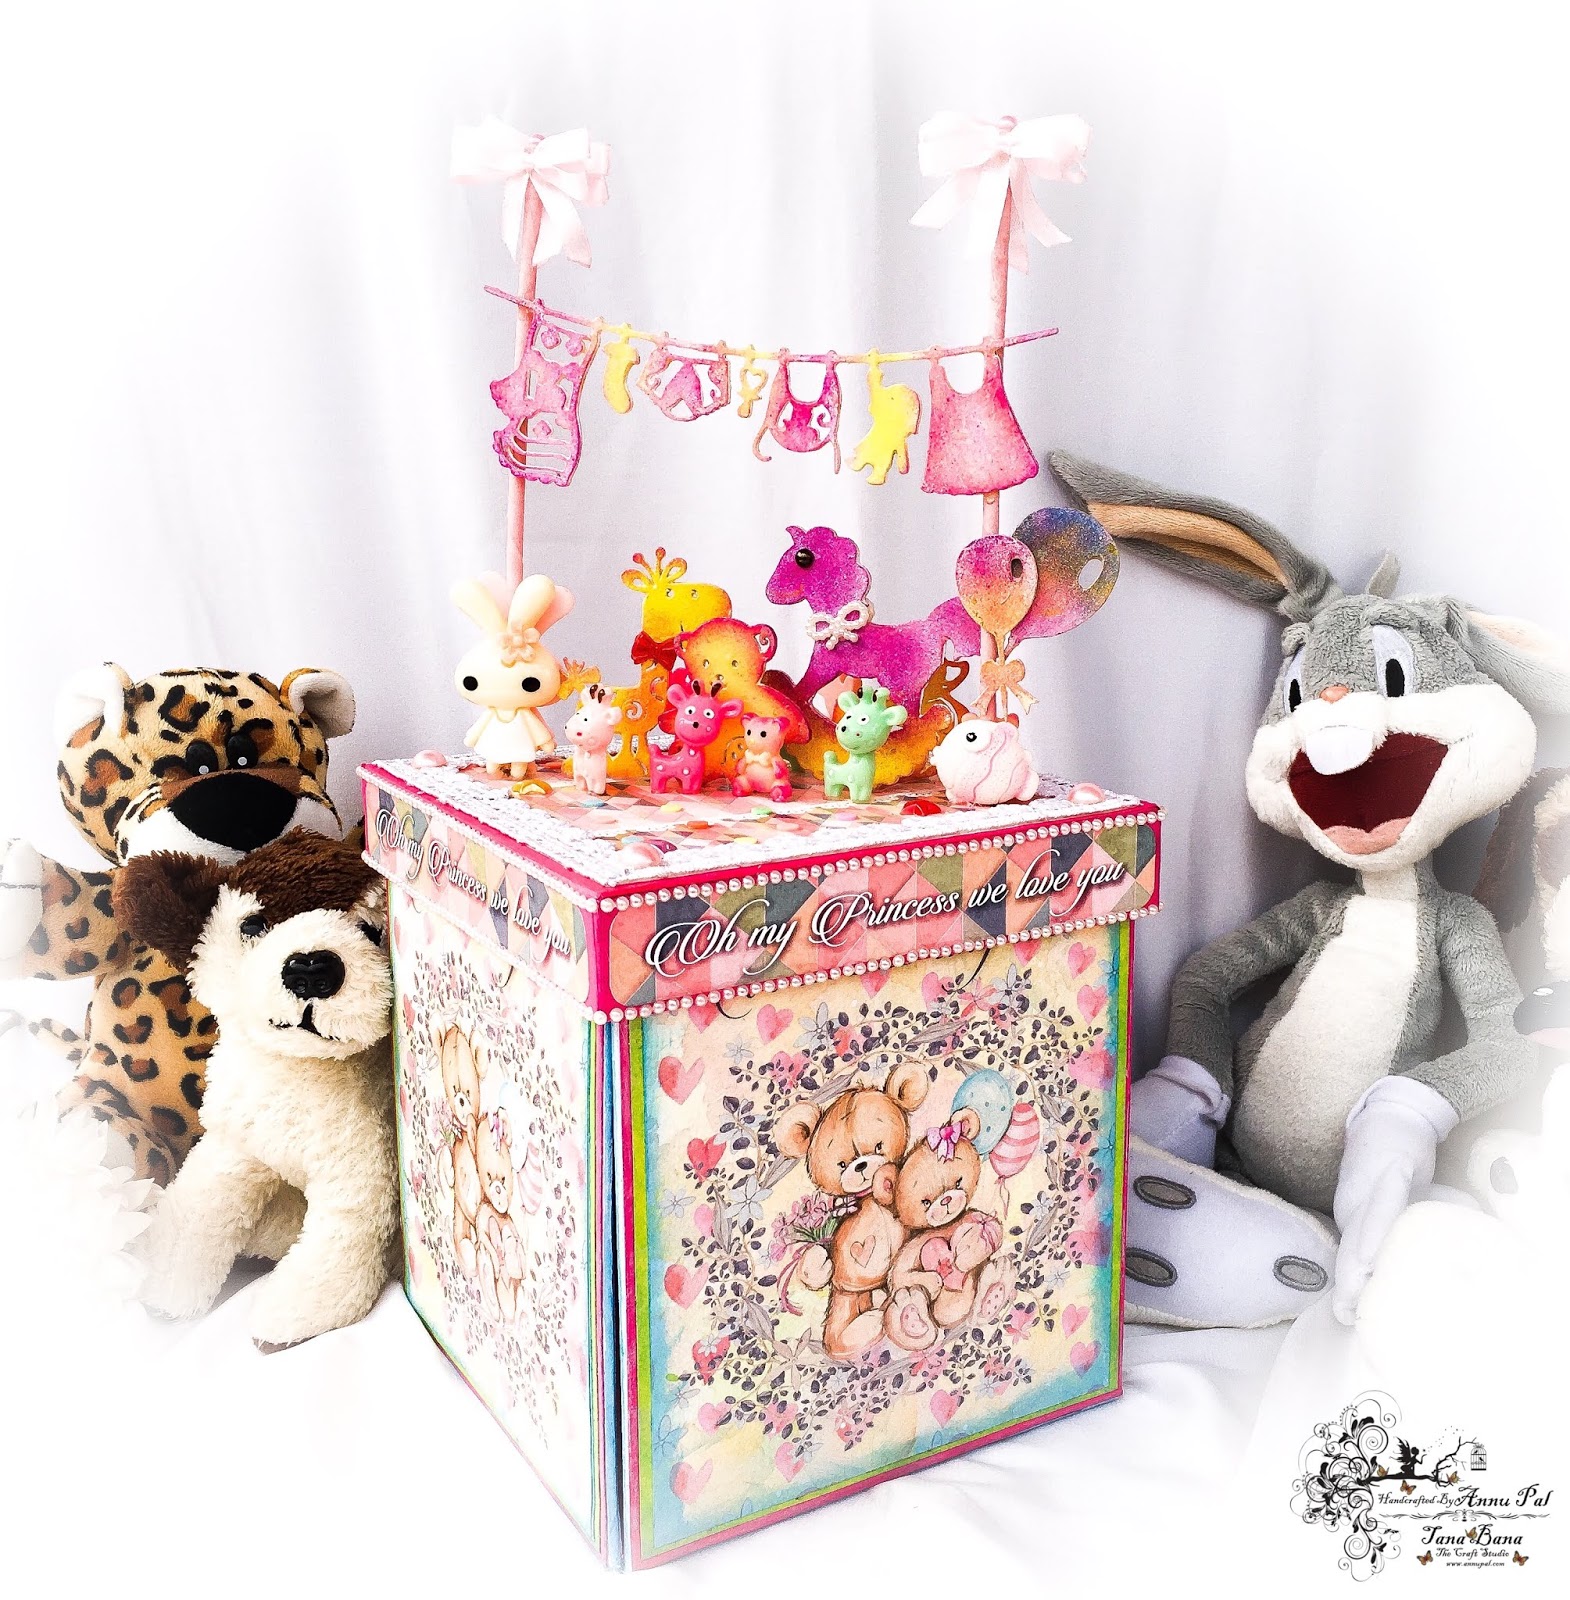
Firstly I cut out 4 banners saying "Oh MY Princess We Love You" and pasted it to the four sides of the lid, pasted self adhesive strip of mini half pearls. Next I cut the pattern paper measuring 6 inch by 5 3/4 inch and pasted it on the top side of the lid,I also pasted floral lace on the side of the pattern paper on the top of the lid. For banner, I used straws by covering them with baby pink floral tape and used wooden baby cloth line embellishment and 4 small bows and glued them on each top both sides of the straw and on top of the straw I also added two small half pearls. Next I took some wooden toys embellishments and other 3d toys and glued them below the cloth line as desired and lastly added some little pearls and colorful round acrylic dots for decoration so finally the lid is ready to place on top of the box. Hope I inspire you all this time too with my creativity. 

Here is the video overview of this box----


Thanks For Stopping By

Happy Crafting!!

Love And Hugs

Tuesday, 26 February 2019

Sail The Ship of Memories

Hello crafty folks,

This is Anjali Sharma,designer @the element craft studio and today I am here with this gorgeous ship album I recently done using lots of elements from the studio.


Materials used from the store

Here is a quick and easy way I made it-
- First I took the album base and cut all the patterned papers of the shape of each page from the Sea shine patterned papers.
(The papers go perfectly with the ship, and the theme)


-then I have pasted the papers on both sides of the base pages.
-I made 3 shakers windows on one of the page by using shimmers and sequins.


-for the cover I have used different fussy cut elements from paper pack, wooden cutouts and added the beautiful chipboard shaker elements from the store itself.
-I have used glimmer dust on the Chippies on the cover.


-further I have embellished the entire book from the fussy cut elements in to patterned paper pack itself as it goes perfectly with the theme.
-I have made waterfalls, pockets for tags and layouts for pictures on the pages of the album.


Hope you guys liked the project.
Do share your feedback and reviews.
All the materials used for the album is available at “THE ELEMENT CRAFT STUDIO”


Thanks
And Happy crafting

Regards

Monday, 25 February 2019

Mix Media Photo Box

Hi all, Anika Mittal Here.....it's always fun to work with TECS bases and crafting products. I always appreciate the awesome products of TECS. 


     Here is the tutorial of double window Photo box---

5---Bubblegum Chalk Paint
6---Purple Fields Chalk Paint
7---Black Chalk Paint
8---White Chalk Paint
9---Vintage Gold Chalk Paint
10---Tiny Butterflies Stencil

Before starting, I removed all the hinges and latching hook from the box. It helps to keep them clean and it also helps to stick the decoupage paper properly. You can easily put them back after decorating your front and back of the box. 

I prepared base coat of gesso on the surface of the box first. After drying the base coat, I applied black color as base in front of box. To add some texture, I rubbed the wax candle on the surface. Now I gave the strokes of different colors.


After the colors completely dried up, I rubbed that with sand paper. I have used TECS butterfly stencil with black embossing powder to give some designer look of our front of the box.

Then I placed mix media elements in one slot of my quilling box and paste them together.  Another side of slots, I placed lady pic and put acrylic glass back with fabric glue. Now to do decoupage, I taped the sides of the boxes. Taping the top and bottom parts together , helps to do decoupage properly. 


After finishing the front , its time to start working on inner beauty. I colored the sides of the inner part and then did decoupage inside the box. 

Now its time to give your project final touches.  Take out your distress inks,  your golden color and give some corner strokes to give your project a final look. 


Hope, you all liked my pictorial. If you have any queries or suggestions about the project, please let me know. Always happy to share what I know!!! 

Happy Crafting to all of you!!!

Wednesday, 18 April 2018

My Little Princess Baby Album

Hello dearies....I am back on the blog with my new project using My little princess paper pack from The Element craft Studio..

Glimpse of My little Princess album..


The papers are perfect for albums..cards..
I loved the way it came out...
For the cover I made a shaker embellishment and have fussy cut the elements from the pack..
Here is the video overview of this album---

                Hope you all liked it....

 Thankyou
SHEETAL THAKORE


Sunday, 15 April 2018

Altered Sewing Machine Drawer


Hello friend jinal here from jinal arts.... Today i am going to share with you most interesting and a very different decoupage article a sewing machine.....When I received my DT kit with this drawer, felt so happy and was clear about my concept of what I wanna do with this beautiful base...As professionally being a Fashion designer, I am used to work on sewing machine and this base made me remind my designing course... Feeling very excited to play with this base and awesome decoupage papers of AnRa Crafts...Here is the overview video of the project I made--


LIST OF MATERIAL ---
A wooden sewing machine drawer from TECS..
Wandering Jane decoupage paper of AnRa Crafts from TECS.
Modpodge Gloss 
Twines, ribbons, pearls, buttons, laces from my stash 
Temporary Tattoo sheets
Folk Art colors
Inka gold 
Wooden embellishments from TECS


 SO let's start making this wonderful piece...
Firstly i took machine's upper part and placed on paper where i wanted to get which pattern and cut paper upon markings. I cut down 1/4 inch lesser paper than the actual measurement and marking..

Now I took folk art colors and provided a base to whole wooden piece, after it dried, applied modpodge and adhered decoupage sheets as per my placement idea...


With the help of scrapper, I removed air bubbles and gave a smooth finish and let it dry...

After all sides are done, gave it a nice coat of modpodge and let it dry completely...


Now the time to decorate and alter the base....I took temporary tattoo of filigree designs and transferred upon base where I wanted as I wanted to try something new and these came out very beautifully.....


After it dried completely, I started decorating it with pearls, laces, buttons and wooden embellishments... 


Then I touched it up with Inka Gold on all edges to give it a vintage n altered look...


 At last, I did a bit stamping as final touch.....


Hope, you all would have liked the post and my altered sewing machine drawer...Give your love in form of feedback msgs and share the post....

Love you all...Jinnu


Wednesday, 11 April 2018

Lampshade using TECS Decoupage Papers

Hello my crafty friends......


It's me,Arpita here on the blog today....with a simple yet a beautiful project.I received this gorgeous lampshade base by THE ELEMENT CRAFT STUDIO and fell in love with this piece instantly,its so beautifully designed and conceptualized. I also received their recently launched decoupaged papers,which are 100 gsm papers with great prints,lovely colors and has a great texture,I absolutely loved working with them.So here is what I made.....


Tutorials

1 .I roughly cut the decoupage paper to size of the panels adhered them using modpodge one panel at a time,sanded the extra paper..once done with all the panels I applied a coat of modpodge and 2 coats of varnish.

2 .Next was to paint the stand,i used lilac chalk paint...applied 2 coats of the chalk paint and to add some interest to the stand i decided to do some gilding using a silver leaf and did some stenciling using modelling paste on the base of the stand.

3. Finished it by adding a lace trim and some beads to the top part of the lampshade.

ThankYou for stopping by...
see you soon with another interesting project,till then
HAPPY CRAFTING!!!

Arpita


Friday, 6 April 2018

My Little Princess Explosion Box

Hello friends, Jinal here....
Today I have an explosion box made from TECS's paper pack "My Little Princess" to share with you all. I love making explosion boxes but baby explosion box I have tried for the first time and loved the pack completely... lots of fussy cutting...layering..have tried using less of stamp n outer stuff as papers are a complete package itself to make any album, card or box... 

First I am posting video of the box...In that video I have specified why I have kept this style.... hope you will like my idea for using this papers...


Lets get started... Material used are paper pack "My Little Princess" from TECS. White iris Card stocks Glossy assent.glue scissor. Distress ink picked raspberry. Laces and button pearls from my stash... Have used minimal product from outside and used more of papers only.... 

Procedure----Take 12 by 12 card stock...and score at 4/8/12 on both sides... So you will get 9 equal parts... Chop of the four corners... As in the pic..
                           
  Then next layer take a bit smaller size from the first layer ,chop of the corners.. Layer it with pattern paper front and back according to your wish...
                                             
  After that take a 9x9 inch card stock score at 3/6/9 on both sides...n just slit all four corners and stick the pattern papers as shown in d video....stick the paper in such a way that when all the pieces are opened one whole pic is seen...and then make a 2x2 inch magnetic box...in which you can put small teddy /gift/ few chocolate.... Make a squash for 2 sides of first layer.... For folded pop up card for 2nd layer....
For the lid have done fussy cutting of teddy, fairy...lamb and other stuff....used lases and buttons, pearls to decorate the box...


Looking forward for your valuable feedback about the box...thanks... Love, Jinal..