Wednesday 29 May 2019

Bottled Memories---Baby Album

Hi All,

This is Rimjhim from The Element Craft Studio. Today I am here with my another project : Baby Album

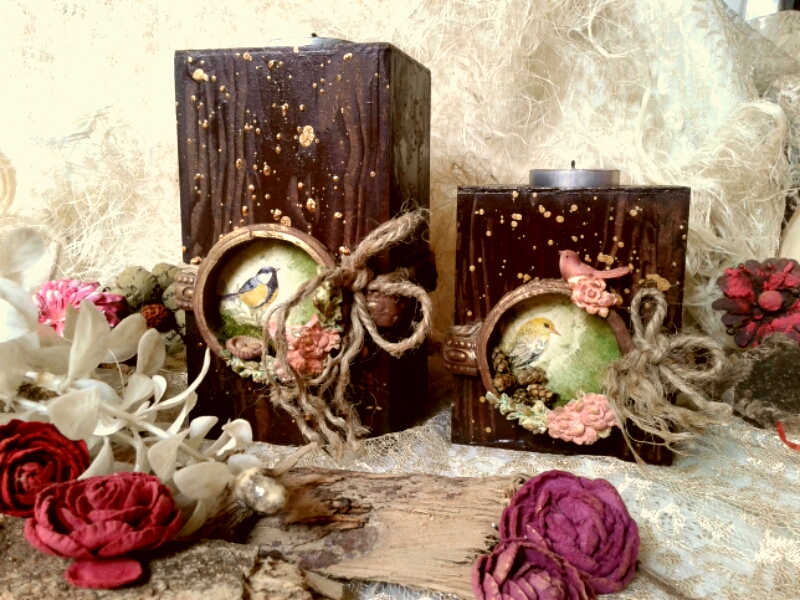
Here is a glimpse of my Project.


Material used:

Dollies
Embellishments

Step 1: It's amazing to work on this newly launched baby album. Firstly, I primed the surface with a coat of gesso.


Step 2: Then I applied blue chalk paint to cover my base. After applying the chalk paint, I decoupage "My Naughty Prince" paper pack. The paper pack is just amazing. I am sure you will fall in love with it as I did.


Step 3: After that I started arranging the embellishments, wooden frames, chipboards, flowers according to my plan. 


Step 4: I also used shimmer glitter and stones for decoration.


Tadaaaaa... my baby album is ready.. This album is dedicated to my nephew who just came into our life two months back..


I hope you enjoyed my post. Looking forward for your comments and feedback.

Cheers,
Rimjhim

Thursday 23 May 2019

Sunny Roses on Jar

Hello crafty folks,

I am back again at TECS blog with my other inspirational project, recently TECS launched new Jute flowers. They are just amazing with so bright and fresh colours.

I received a beautiful Acrylic front Jar as my DT kit. I love to alter jars.


The materials used from TECS :
  1. Acrylic front Jar
  1. Rustic gold Decoupage paper 
  1. Juthe flower
  1. Wooden cutouts
  1. Chalk paint
Let's start the procedure to alter a Jar.

First, I gave a coat of chalk paint ( Rustic Russet ) to the entire jar. After that, covered 3 sides of jar and lid of the jar with Decoupage papers ( Rustic Gold ). Cut the papers according to the size of the Jar and glued it with Mod Podge. Added texture with modeling paste and color .


Second Step is to gather all embellishments to decor the Jar. I used TECS

different wooden cutouts. Arrange them roughly first and after that glued them with a hot glue gun. Now I added 3D stickers for more interest. And the step is to add different types of stones to create more depth. It's almost ready now, at the last I stuck Acrylic sheet with hot glue gun in front of the Jar.


It's ready ... Hope you guys love it !!!
Have a good day ...
Thank you,Vidhi Jadeja

Wednesday 22 May 2019

Home Sweet Home

Hello Crafty Folks..

Now greet everyone at your door step with a cheerful and a fresh hello. Yes, I am talking about a name board that defines what you are and be very useful as well.

Today I am on The element Craft studio blog with a very useful project - A pine wood heavy duty nameplate with a slot to add plants or collect your milk and newspaper.


For this,  I used the bubble gum pink chalk paint from Anra crafts and gave it a distressed along with adding some portions of stenciling.


The corners I used the metal findings,  book corners to give it a very vintage finish as well as protect the edges.


This welcome chipboard is a very beautiful and intricately cut pattern from the chipboard collection from Anra Crafts.


Added our family name along with Metal Home embellishment to finish the top.


The panels I distressed with black archival ink from ranger. 

How do you like it? 

Do let me know on the comments below ☺

Here is the list of all the materials used to make this nameplate.

Friday 17 May 2019

Handyman for Letters

Hi all dear crafty lovers, today i am going to share the tutorial of vintage letter rack. 


Another wonderful DIY base from TECS… TECS bases are beautiful  and at the same time very useful too. Stylish and sturdy wall mounted mail organizer with two pockets , provides great convenience and functionality to keep your mail, letters, small documents and catalogs etc in one place with easy accessibility. Let's start with the list of material we need to create this project-

Mod Podge
crackle medium


To start the project, first i applied the barley green chalk paint on the back piece of the organizer. After drying the base color i applied crackle medium on that and then painted soft sun chalk paint as the top coat. I just wanted to give the feel of crackle effect , so did not use very contrasting colors. 


 pic of crackle effect


For the front rack pieces , I applied mod podge on the surface and covered the surface with TECS bordure decoupage paper.  I gave distress effect with archival brown ink on the sides .


After drying the mod podge, I applied varnish on the front rack peices. Then I have used golden color outline tube to highlight some lines of the paper designs and decorated it with wooden cutout and metal vintage knob. I also colored the ball chain in brown color and stick that to give the border design to the flap pieces.


To give the back piece little darker effect, I did dabbing with brown color. Then I  assembled all the pieces together.


To give the final touches to my project, i applied brown color distress effect on the sides of the organizer and decorate it with resin embellishments. 

For resin embellishments, first I applied the gesso on the pieces and then color with brown chalk paint and gave some highlight with golden color.  I hope, you all will like the project. 

Please feel free to message me if you have any questions. all suggestions and reviews are welcome. Thank you for reading my blog. HAPPY CRAFTING to all crafty lovers.

Thanks,
Anika


Friday 3 May 2019

Winners of Mood Board Challenge April 2019

Hello friends:)

It's Rakhi  here to announce and congratulate our first ever Mood Board Challenge winners----


A heartfelt thanks to all of you who have shared your creative, beautiful and amazing creations with us to participate! Every entry was so beautiful that we truly faced tough time to select just three winners!!!

I am feeling honored to share all selected entries in form of a small gallery...although winners are just three but I truly feel everyone of these also a winner itself as they have courage and enthusiasm to participate and create their own space among others! Bravo my buddies, love all of you soooo much...


All three winners will get their 
amazing craft goodies from The Element Craft Studio and a chance to share a guest designer post on our blog made by using these goodies....
 and....

Here is the surprise for you all creative minds---along with three top winners, we are giving 4 appreciation prices also to 4 entries, who will also get tempting craft goodies from TECS.

Many of you were inspired by color, few by texture, few by motifs and few by season....we have chosen winners as per the most utilized elements of mood board and creativity...

Here I would like to share some facts about Mood Board Challenge---this challenge is not about sending our old posted earlier projects but to make a fresh and new entry as per guidelines of elements indicated in Mood Board to be used to make an entry. Then sharing that entry with caption of mood board challenge by tagging blog post and TECS and then sending us mail of this entry with your details... 

As this was our fist challenge so we ignored some facts but please gals, next time follow guidelines for sure while participating...

Hope, we did justice to this challenge and get ready gals for next Mood Board challenge for the Month of June....will post next challenge soon gals, keep checking!!!

Here are the entries of our First three champs with their names---


Meraj Zaidi 


And here are our 4 lucky winners for appreciation goodies bags---

Anju Aggarwal
 
Meera Savla

Pallavi Kapoor

Here are other beautiful entries which stole our heart and we could not resist to share these with you all---

Aparna Shaw

Hemali Shah

Juhi Jain

Neha Phutela Mehta

 Nivedita Ahuja

Priyanka Srivastav

Ruchi Surana

Shilpa George

 Smita Singh

 Surbhi Modi

Jansi Rastogi

P.S.---Please share your complete address with phone number via mail rakhigarg146@gmail.com to claim your prices...

Happy Crafting Gals,

TECS Team!!!

Thursday 2 May 2019

Love Packed in Box

Hello guys,

I am Back on TECS, this time with a gift idea for Mother's Day. Mothers are everything to us and I am sure, none of us would like to leave a chance to make them feel special . Let's get going !


To begin with I have a beautiful carved box from TECS, all their products are super strong and smooth.

There is no need of sanding required. Using the stencil, I created some texture on the base.


Now,  once the texture paste is dry,  varnish on the texture,  so that it doesn't spread while painting above.  Now I painted the whole box with this beautiful wine red chalk paint from Anra Crafts.


Using a decoupage paper,  I pasted the inner base with these cute deer's..  Looks like a mom and daughter to me ☺ isn't this print beautiful? 


Now the top flap of the box I applied crackle medium and painted with a cream for the red cracks to show.


I took one more decoupage paper with beautiful flowers and randomly cut them to do volume decoupage.


Pasted the fussy cut flowers on to the sospeso sheet and fussy cut and embossed them to make a beautiful floral arrangement for the top of the box.


Added some pollen and pink glitter to add some interest.


Finished the arrangement by adding a sentiment "Memories" In the center.


So,  this is how the box looked once done. 


Now,  to make it look more vintage,  I added these metal legs from the Anra Crafts metal embellishment collection.


I totally love the outcome,  and hope my mom would love this too ðŸ™‚


I hope you like this project.  Please let me know your thoughts in the comments below.  Thank you for stopping by! 
Until next time..  ❤
Here is the List of all the products used in this project
Trellis Cut work lid box
Deer charm Decoupage paper
Border Fleur decoupage paper
Soft Skin chalk paint
Wine red chalk paint
Zigzag magic
Pink glitter
Metal legs