Monday, 8 April 2019

Reading with Roses --- Shabby Bookmarks

Hello Craft People 🙂

Manasa Priya here with a quick DIY inspiration for this month's blog challenge at TECH - anything goes shabby chic using atleast one element from the Element Craft Studio.


So, as you all know I love shabby Chic style and using distressing with flowers and the likes.


That has what has inspired me to create these quick bookmarks.


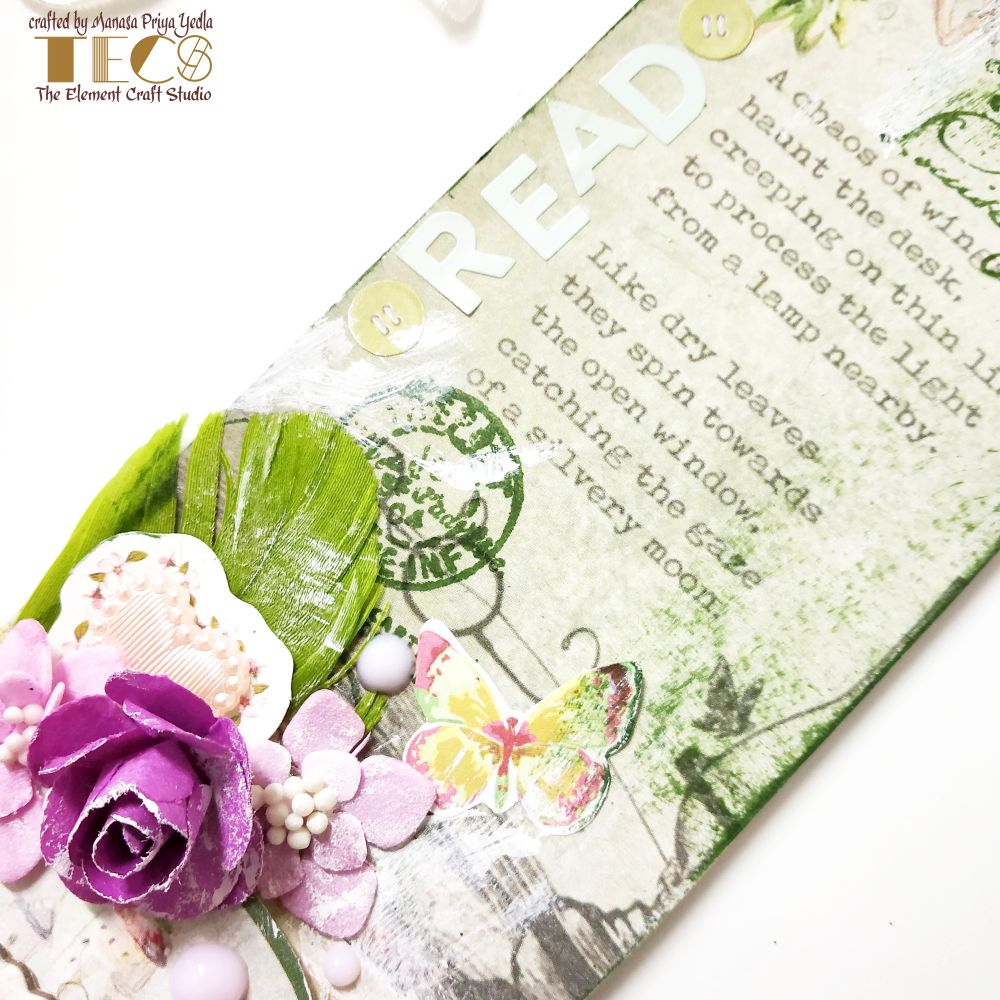
Do I have taken the MDF bookmarks from the store and decoupage them with the fairyland scrapbook paper. It is full of beautiful quotes, sonnets, little fairies and I really love the prints. And it's got beautiful coordinating element sheet as well.. Which we can fussy cut.


Then I added washi tapes in the empty spaces and distressed the edges and stamped randomly to make the background a little busy. 


 And I assembled all the elements using some foam tape to give it a dimension. Now comes the star of the show, the beautiful flowers.. These are the newly launched paper flowers from RECS. Look at those pretty colors 😍 these are super cute and goes well with any projects


I finally finished it off by adding some embellishments and stickers and ties laces over the top. 


I hope you enjoyed looking into this project ☺ please do participate in the monthly challenge to win some amazing prizes. 

Until next time.. ❤

Here is the list of all products used in this project---


Sunday, 7 April 2019

Flairs On the Rock-- Crinkled Decoupage Plate

Hello buddies, Bindiya here again with another absolutely unique vintage style project. 

Whenever u think to do decoupage on any glass product u mostly think of reverse decoupage technique but here I came up with a very different techniques called as decoupage with cream crinkled tissue texture background on a beautiful glass plate from TECS. 

So here the result is---


Material used
3. White gesso
6. Fevicol 
9. Inka Gold


wanna learn this beautiful art piece gals? Book your kits with us and create a master piece by your own for your home and for your loved ones---


Message and comment here please to know more details about online video class---

Happy Crafting Gals...

Friday, 5 April 2019

Speckled Spark--Mix Media basket

Hello crafty folks,

How are you doing? Vidhi here, back again at TECS with my other project. The MDF products are so amazing from TECS that we don't have to do so much on it as finishing and quality is so good.


Materials used from TECS:

This time I altered a TRELLIS Basket from TECS. I have used beautiful MDF cutouts from the store. Oval Frame pair and Gear set. These cut out are amazing with fine details.


 Now let's start the procedure to make it...

 First I gave a coat of Black gesso to the entire basket. 


Then I roughly placed my MDF cutouts on their positions. I have put a peacock as my focal point but later I changed that.


I added some flowers and rhinestones too. After finalist positions, I stuck all the elements on the basket with heavy gel and again gave a coat of black gesso on it.


Now the next step is to color them. I used metallic paints to color all the elements. Used bronze and golden metallic. Didn't color them much as I want the black shadow effect on it. Just highlights with colors. At the end used waxes for more shine and mini stones to create more interest.


Time Travelling

Hi All,

This is Rimjhim from The Element Craft Studio. Today I am here with my another project : Shadow box

Here is a glimpse of my Project.


Materials used:

Flowers


Step1: I took the raw base from TECS. As mentioned in my previous post, the bases are already smooth and well sanded. So I directly applied gesso as the first layer.


Step2: After applying gesso, I colored the entire project with tanned tone chalk paint mixed with burnt sienna acrylic paint.


Step 3: Once the base was ready, I decoupaged the travel theme paper pack from TECS. I must say, paper pack is just awesome. Lovely prints and amazing designs.


Step 4: After doing decoupage, I collected all my accessories, paper cuts, embellishments, metal charms and flower to decorate my shadow box as per my requirements.


and here it is....


I hope you like it. Do share your feedback and let me know if you have any questions or queries.

Wednesday, 3 April 2019

A Rustic Era--Vintage Tray

Hi all crafty lovers. Anika here with another beautiful project for you all... Here I am presenting tutorial of Vintage style Tray having that Oldie Goldie rustic era charm---


All TECS trays are beautiful but this vintage rustic tray is my favorite. It was really a great fun, working on this project. So, lets start our project dearies. First here is the list of material we need for this project. TECS is getting one stop crafting shop, most of the material is available only at TECS itself---

Vintage Tray Golden Chalk Paint
Faded Teal Chalk Paint
Gunmetal Chalk Paint
Mod Podge Gold leaf Paper
Ball Chain
Epoxy Resin
Resin Charms

We are starting our project by arranging our resin charm decoration pieces on the tray. Try different ways to arrange your pieces and once you get satisfied with your arrangement , paste them on the tray by using Mod Podge. I also used ball chain to give border finish on the inner border of the tray.


Oops, forgot to remove the handles. No worries, now we can do that. Remove the handles to keep them clean. Now, color the tray with AnRa Crafts faded teal paint.


Give some brown color shades around the charms to give them depth. Also, use your dry brush and give some strokes on the border of the tray to highlight the beautiful cutwork of the tray. Its time to give some shine to your tray , so use AnRa Crafts vintage golden chalk paint to give some highlight.


Now, its time to decorate your tray with beautiful vintage beauty. Oh, how to cut the paper in round shape. It was the question. So, I used kitchen paper towel and mark that by putting on tray first and when I got the perfect shape of the paper napkin, I used that to cut my decoupage paper in perfect shape.Place your vintage beauty on the tray. At this time you can also put back your handles or you can do it later.


Now, use some gel medium to cover the surface of the tray. Paint the inner sides of the tray with brown color and spread that little with cheese cloth. For gliding, I have used spouncer, put the modpodge on the plate and pat the spouncer and do some strokes here and there on the plain side. When you use spouncer you don’t need to wait and you can stick your gold leaf paper at the same time. Now, wait for ten minutes and remove extra leaf paper with brush.

And now its time for finishing touches. So, for this project I have used epoxy resin to give a shiny look to my project. I mixed up the resin and pour that in the tray. It takes 6-7 hours to get the resin dry. And here is our final project.


Hope, you all will like the project. Please feel free to message , if you have any queries. Happy crafting dearies.

Tuesday, 2 April 2019

Mini Theatre

Hi Crafty Pals..

This is Sheetal ,Creative Designer at The Element Craft Studio.Today I am here to Share a Mini Theater Shadow box card with you all.

Here I share the Glimpse of the Project.


This project is full of chipsters basically in a beautiful Garden theme. I used lot of leaves clusters cutout and tried to give it a fresh look of greenery.


List of Materials used

Flowers from my stash

Step 1: I took 12 by 12 inches white card stock and trimmed it to the size of 7 by 12 inches. 


Step 2: Next I scored the lines as given just to make a proper folding of the card.


Step 3: Next I have used a border punch to punch the upper border and inked the edges.


Step 4: I took 2 strips to attach in the inner side of the folded Shadow box, placing one backward and the other at the front as shown in the picture.I layers all the cuttings with the beary love paper pack...


Step 5: Finally I placed the Garden bench,leaves, Dancing couple,stars,branches after coloring them.I applied white glimmer dust on the cupid cutout and the stars as well and embellished the shadow card with stone lace..And this is how it looks :)


Monday, 1 April 2019

Summer's Shabby Moon

Hello April ☺

Welcome to the bright and colorful summers . This is the season of holidays and thus a lot of travel and outdoors.

This month at The Element Craft Studio is about Summers in Shabby Chic style. Do participate in this months challenge, using any TECS products and win some cool prizes.


So, this is my take on this month's challenge for you to get inspired.

A shabby chic moon shadow box with the quote Live love laugh. I included some travel charms to go with my decor. Material used from TECS:---


So, to get started.. I have taken this beautiful base and stenciled and added texture on top to give it some dimension.


Later I painted it in the yellow colors. These are the beautiful shades of newly launched chalk paints from Anra Crafts, the sister concern of TECS. The chalk paints are if great pigmentation and coverage. These are really buttery...


Now I have taken the decoupage paper with these beautiful flower bunch and fussy cut and embossed them to add it to the frame.


Later I took these sentiment with arrow chipboard and added the beautiful shimmers in the colors pink and green.. So it is all blended together.


Now in the empty spaces I added some metal embellishments and fussy cut travel theme pictures to go with the theme.


I hope you enjoyed looking into this beautiful and bright shabby chic shadow frame. 


Please let me know how you like this project in the comments below.


Please do take part in this challenge and share them with us over the blog or over the Facebook group.


Until next time..  ❤ Happy Crafting!!!