Showing posts with label Wall Decor. Show all posts

Thursday, 6 June 2019

Geared Time--Mix Media Clock

 Hello Buddies, this time I have come up with a very unique, classic and vintage and Steampunk style Wall clock with lots of beautiful hangings.I m sure you are going to love this. 


I have made a video tutorial for this....please contact for class details...


Materials used

Chalk paints:
1.Soft sun
2.Bloomed sun
3.Breezy blue
4.Tanned tone

Metallic paint:
1.Vintage golden

Gesso:
1.White gesso

Wooden chippies
1. Steampunk gears 
2. feathers
3.Wings
4. steampunk key
5. Dream catcher 
6. Butterflies
7. Numbers

Metal Charms:
1. keys
2. coins 
3. gears
4. metal chain 
5. Jump rings
6. brads

Base:
1. Mdf steampunk style base
2. Acrylic front cover
3. Clock machine 

Glue :
1. Decoupage Glue
2. Hot glue Gun
3.Glossy accent


Wednesday, 22 May 2019

Home Sweet Home

Hello Crafty Folks..

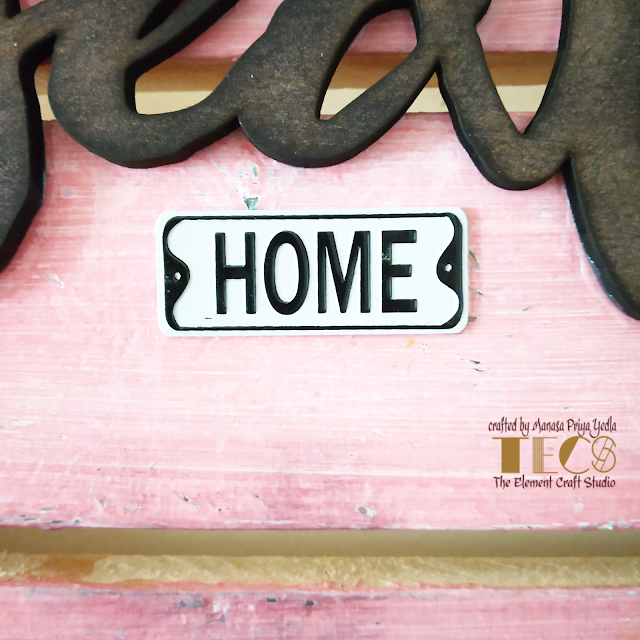
Now greet everyone at your door step with a cheerful and a fresh hello. Yes, I am talking about a name board that defines what you are and be very useful as well.

Today I am on The element Craft studio blog with a very useful project - A pine wood heavy duty nameplate with a slot to add plants or collect your milk and newspaper.


For this,  I used the bubble gum pink chalk paint from Anra crafts and gave it a distressed along with adding some portions of stenciling.


The corners I used the metal findings,  book corners to give it a very vintage finish as well as protect the edges.


This welcome chipboard is a very beautiful and intricately cut pattern from the chipboard collection from Anra Crafts.


Added our family name along with Metal Home embellishment to finish the top.


The panels I distressed with black archival ink from ranger. 

How do you like it? 

Do let me know on the comments below ☺

Here is the list of all the materials used to make this nameplate.

Friday, 17 May 2019

Handyman for Letters

Hi all dear crafty lovers, today i am going to share the tutorial of vintage letter rack. 


Another wonderful DIY base from TECS… TECS bases are beautiful  and at the same time very useful too. Stylish and sturdy wall mounted mail organizer with two pockets , provides great convenience and functionality to keep your mail, letters, small documents and catalogs etc in one place with easy accessibility. Let's start with the list of material we need to create this project-

Mod Podge
crackle medium


To start the project, first i applied the barley green chalk paint on the back piece of the organizer. After drying the base color i applied crackle medium on that and then painted soft sun chalk paint as the top coat. I just wanted to give the feel of crackle effect , so did not use very contrasting colors. 


 pic of crackle effect


For the front rack pieces , I applied mod podge on the surface and covered the surface with TECS bordure decoupage paper.  I gave distress effect with archival brown ink on the sides .


After drying the mod podge, I applied varnish on the front rack peices. Then I have used golden color outline tube to highlight some lines of the paper designs and decorated it with wooden cutout and metal vintage knob. I also colored the ball chain in brown color and stick that to give the border design to the flap pieces.


To give the back piece little darker effect, I did dabbing with brown color. Then I  assembled all the pieces together.


To give the final touches to my project, i applied brown color distress effect on the sides of the organizer and decorate it with resin embellishments. 

For resin embellishments, first I applied the gesso on the pieces and then color with brown chalk paint and gave some highlight with golden color.  I hope, you all will like the project. 

Please feel free to message me if you have any questions. all suggestions and reviews are welcome. Thank you for reading my blog. HAPPY CRAFTING to all crafty lovers.

Thanks,
Anika


Wednesday, 1 May 2019

Cute Birthday Board

Hi, 

This is Anjali, Creative Designer at THE ELEMENT CRAFT STUDIO and today I am here to share with you this lovely MDFchopping board I altered.

Here are few pictures 


I have used chalk paints, flowers leafy twines and the base from the store and I love how it turned out.

I used a single layer of the chalk paint and it turned out so well. I worked on layers and added lots of elements to it.


I have added leaf jute twine on the top with mulberry flowers from the store I also added few handmade flowers, some leaf die cuts and butterflies.

I added glimmer dust using glue with stencils and sprinkling the glimmer dust and it turned out so well.


For the final touch I added this cute little stamped image and sentiment.

Hope you liked the project.

Products used from the store:

Thanks for passing by.
Do leave your feedback and comments.
Thank you 

Sunday, 7 April 2019

Flairs On the Rock-- Crinkled Decoupage Plate

Hello buddies, Bindiya here again with another absolutely unique vintage style project. 

Whenever u think to do decoupage on any glass product u mostly think of reverse decoupage technique but here I came up with a very different techniques called as decoupage with cream crinkled tissue texture background on a beautiful glass plate from TECS. 

So here the result is---


Material used
3. White gesso
6. Fevicol 
9. Inka Gold


wanna learn this beautiful art piece gals? Book your kits with us and create a master piece by your own for your home and for your loved ones---


Message and comment here please to know more details about online video class---

Happy Crafting Gals...

Friday, 5 April 2019

Time Travelling

Hi All,

This is Rimjhim from The Element Craft Studio. Today I am here with my another project : Shadow box

Here is a glimpse of my Project.


Materials used:

Flowers


Step1: I took the raw base from TECS. As mentioned in my previous post, the bases are already smooth and well sanded. So I directly applied gesso as the first layer.


Step2: After applying gesso, I colored the entire project with tanned tone chalk paint mixed with burnt sienna acrylic paint.


Step 3: Once the base was ready, I decoupaged the travel theme paper pack from TECS. I must say, paper pack is just awesome. Lovely prints and amazing designs.


Step 4: After doing decoupage, I collected all my accessories, paper cuts, embellishments, metal charms and flower to decorate my shadow box as per my requirements.


and here it is....


I hope you like it. Do share your feedback and let me know if you have any questions or queries.

Monday, 1 April 2019

Summer's Shabby Moon

Hello April ☺

Welcome to the bright and colorful summers . This is the season of holidays and thus a lot of travel and outdoors.

This month at The Element Craft Studio is about Summers in Shabby Chic style. Do participate in this months challenge, using any TECS products and win some cool prizes.


So, this is my take on this month's challenge for you to get inspired.

A shabby chic moon shadow box with the quote Live love laugh. I included some travel charms to go with my decor. Material used from TECS:---


So, to get started.. I have taken this beautiful base and stenciled and added texture on top to give it some dimension.


Later I painted it in the yellow colors. These are the beautiful shades of newly launched chalk paints from Anra Crafts, the sister concern of TECS. The chalk paints are if great pigmentation and coverage. These are really buttery...


Now I have taken the decoupage paper with these beautiful flower bunch and fussy cut and embossed them to add it to the frame.


Later I took these sentiment with arrow chipboard and added the beautiful shimmers in the colors pink and green.. So it is all blended together.


Now in the empty spaces I added some metal embellishments and fussy cut travel theme pictures to go with the theme.


I hope you enjoyed looking into this beautiful and bright shabby chic shadow frame. 


Please let me know how you like this project in the comments below.


Please do take part in this challenge and share them with us over the blog or over the Facebook group.


Until next time..  ❤ Happy Crafting!!!


Friday, 15 March 2019

Hang On---hook up memories

Helloooo buddies, Bindiya here with a very unique and vintage style project--

A perfect art piece for personalized wall decor piece named as Hang On!!!---hook up memories. In this project I have used multiple embellishments ,mediums and techniques which completely blends with each other to get that perfect vintage saga aged look. So here is an unique photo frame with amazing look. 


Another interesting news is, we are providing a kit of this project with a video and picture tutorial for you all with all required material excluding very few basic tools on an amazingly pocket friendly pricing for you all...

Wait, wait....why to take the class? thinking nah? Here is the answer---

This tutorial has all techniques to learn which you need to make any mix media project---

1.Dry brushing technique with chalk paint
2.Distress edges with chalk paint
3.Burnt effect with chalk paint
4.distress effect on corner with archival ink
5. Stamping 
6. Distress background 
7.coloring of chippies 
8. Highlighting of embellishments 
9.Arrangements of embellishments 
10. Glitter effect 
11.use of embossing powder 
12. Use of Ephemera sheet
13.Assembling of the base.


So, gals, what to wait for? Book your kits with us and create a master piece by your own for your home and for your loved ones---


Don't miss this golden chance, just book now...You can get your kit while quantities last at site HERE